Sometimes, after game-updating or some unknown reasons, the emulator will show that can’t connect the network, There are two methods to solve the problem:
First Method: change the DNS settings in the emulator
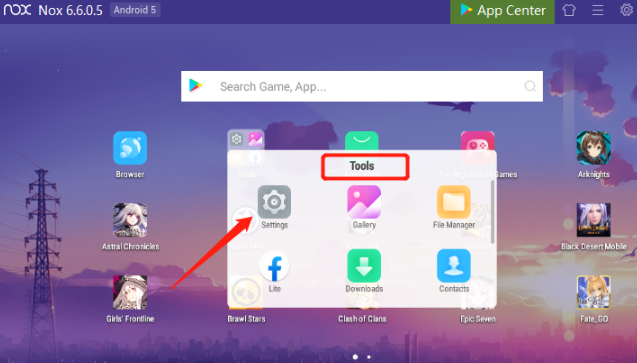
- Click Tools→Settings
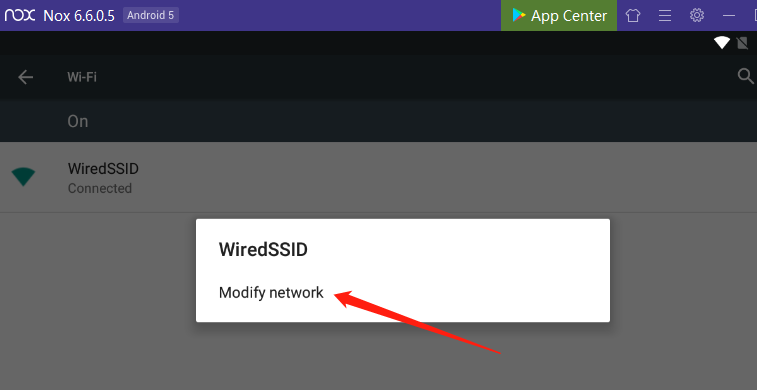
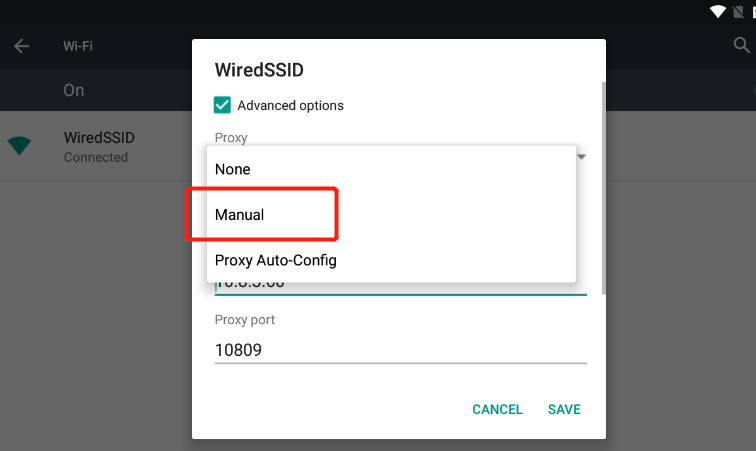
- Click Wifi→long-press【WireSSID】→Modify network→Choose Manual
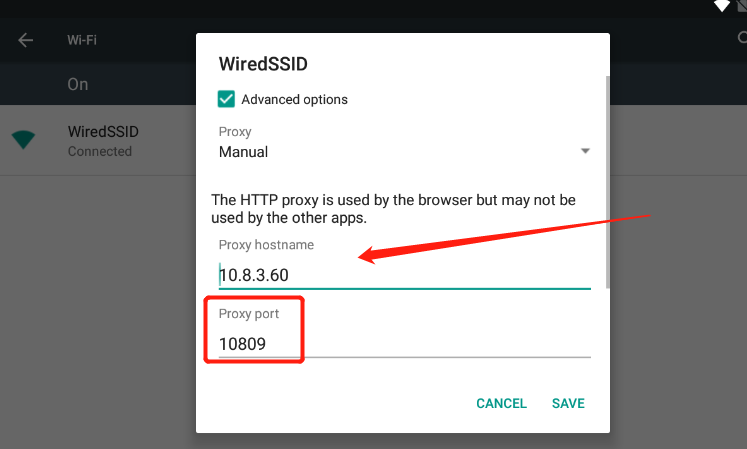
- Fill the 【Prosy hostname】according to your internet IP address. Here is a guide to check your internet IP address: click here
- Fil the 【Proxy port 】as 10809 by default
Here are the guiding pictures:
1. Click Tools→Settings
2. Click Wifi→long-press【WireSSID】→Modify network
3. Choose Manual
4. Fill the 【Prosy hostname】according to your internet IP address and fill the 【Proxy port 】as 10809 by default
Then you will connect your internet with the emulator successfully
Second Method: change the DNS settings (Windows 10) on the computer
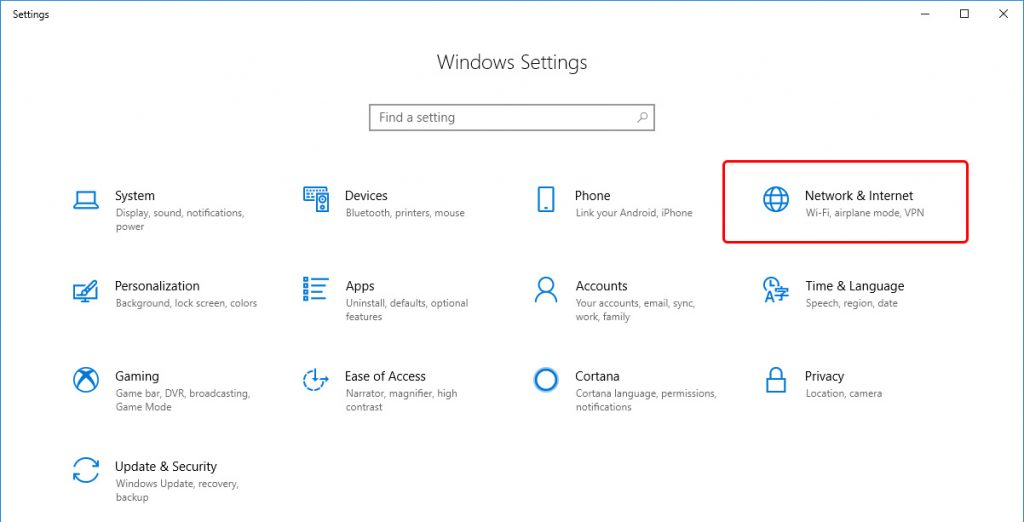
- Open the Control Panel.
- Click Network and Internet.
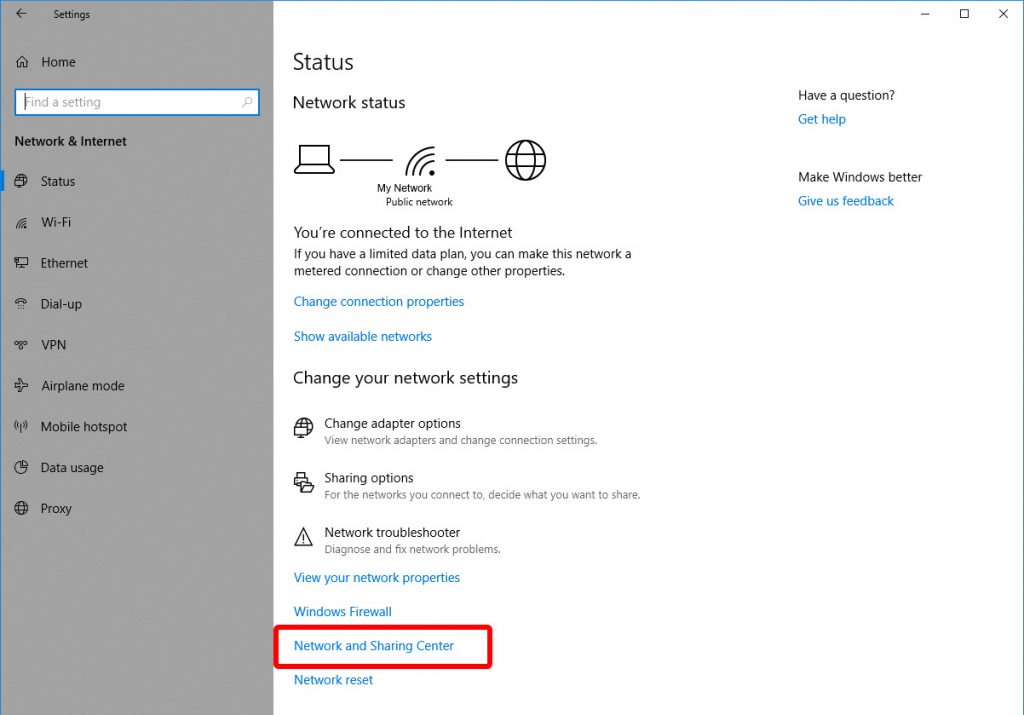
- Click Network and Sharing Center.
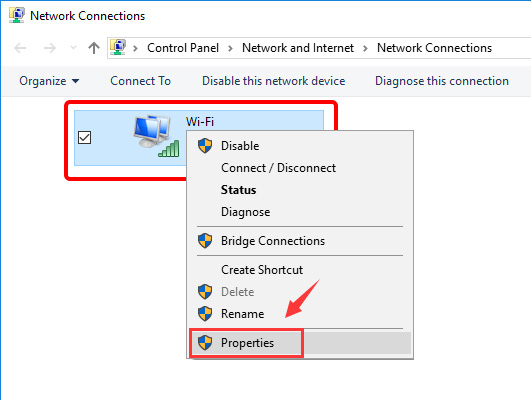
- On the left pane, click Change adapter settings.
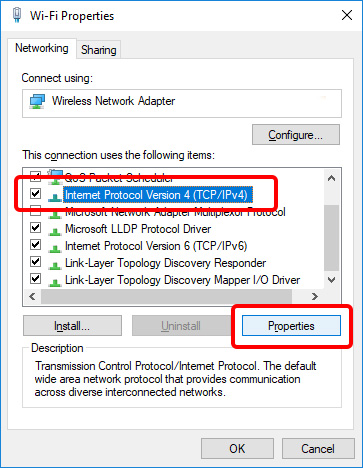
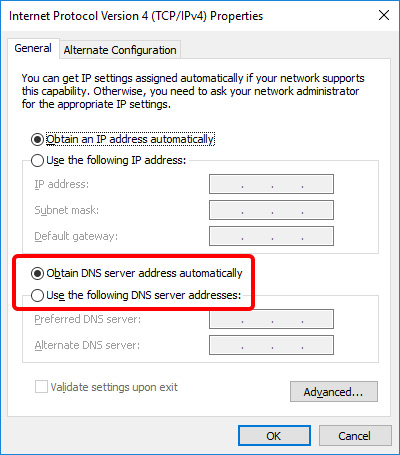
- Right-click the network interface connected to the internet, then click Properties. Choose Internet Protocol Version 4 (TCP/IPv4).
- Click Properties.
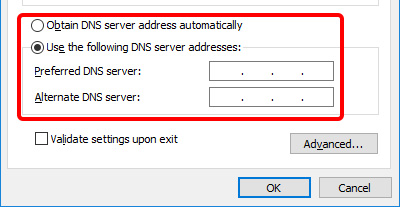
- Click Use the following DNS server addresses→Click Advanced→Enter the IP address in the DNS server fields.
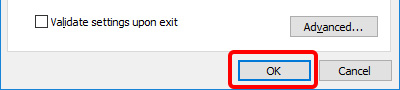
- Click OK, then click Close.
For Windows 7/8, Click here.
Here are Free Google Public DNS IP addresses, you can choose to fill it.
The Google Public DNS IP addresses (IPv4) are as follows:
- 8.8.8.8
- 8.8.4.4
The Google Public DNS IPv6 addresses are as follows:
- 2001:4860:4860::8888
- 2001:4860:4860::8844
The detailed steps as follows:
- Go to the Control Panel
- Click on Network and Internet
3. Click on Network and Sharing Center
4. Go to Change Adapter Settings.

5. You’ll see some network icons here. Select the network you’re currently connected to and right-click on it. Select Properties.
6. Click on IPv4 and select Properties.
7. If “Obtain DNS server address automatically” is selected, click the radio button next to “Use the following DNS server addresses:”
8. Now enter the DNS addresses you want to use.
9. Click on Ok and Close.
Note: If the emulator shows no internet, please click here.